


Enable/Turn WiFi Hotspot in Windows 8/8.1 using Command Prompt
Hi, Today I’ve to share how to enable / turn on Wi-Fi Hotspot in windows 8/8.1 using Command Prompt. The following steps to connect any wireless connection device can connect to the internet via your Wi-Fi Hotspot.
Step 1: Hosted Network Support
At First you have check whether your Laptop/PC support Wi-Fi Hotspot feature or not. Do the following.
-> Open your command prompt in administrative mode [by pressing ‘Windows Key + X‘ and select ‘Command Prompt (Admin)’].
-> Enter the command following in command Prompt and hit enter.
netsh wlan show drivers
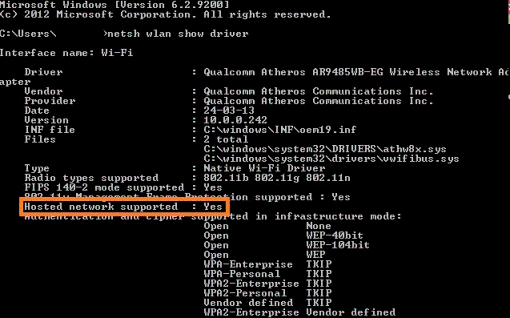
-> If “Hosted Network Supported: Yes” you have the Wi-Fi Hotspot Feature and Go ahead.
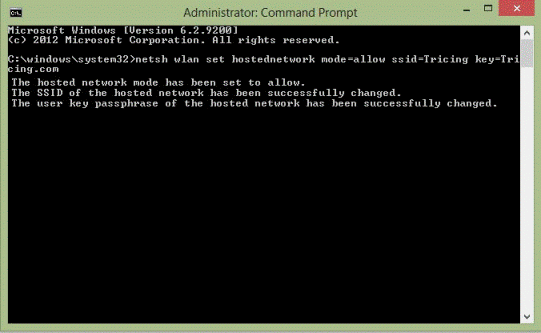
Step 2: Create Hosted Network
Enter the command following in command Prompt and hit enter.
netsh wlan set hostednetwork mode=allow ssid=Tricing key=Tricing.com
Note: Change the value of ssid and Key as you like.
After Hitting Enter you will see the Wi-Fi Hotspot activated Information. Sample Image as below.
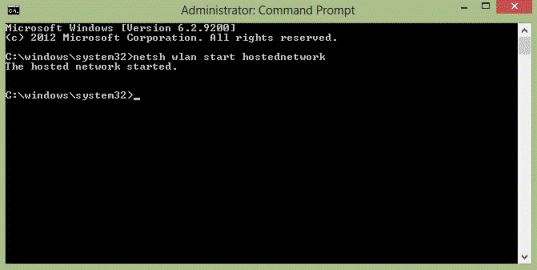
Step 3: Start Hosted Network
To start the Hosted Network service again enter the below command and hit enter.
netsh wlan start hostednetwork
After Hitting Enter you will see the service started Information. Sample Image as below.
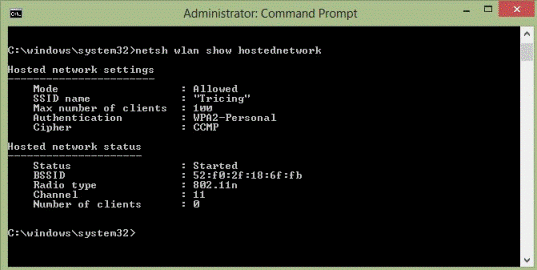
Step 4: Hosted Network Status
To get the Hosted Network status enter the below command and hit enter.
netsh wlan show hostednetwork
Step 5: Share your Internet
Method 1:
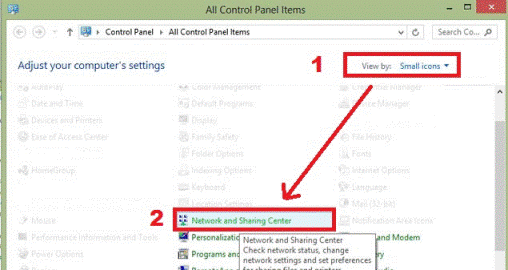
Go to ‘control Panel‘ and click ‘Network and sharing Center‘ as show below
You will see the ‘active networks‘ details. Sample image as follow
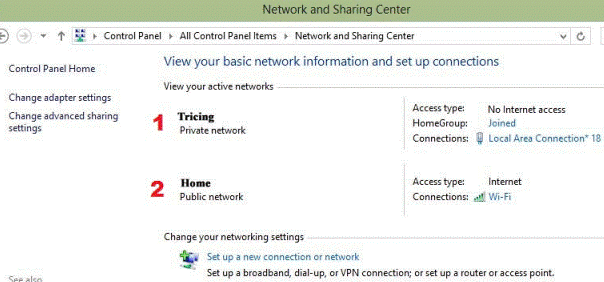
- Tricing [Hotspot]
- Home [Connected to Internet]
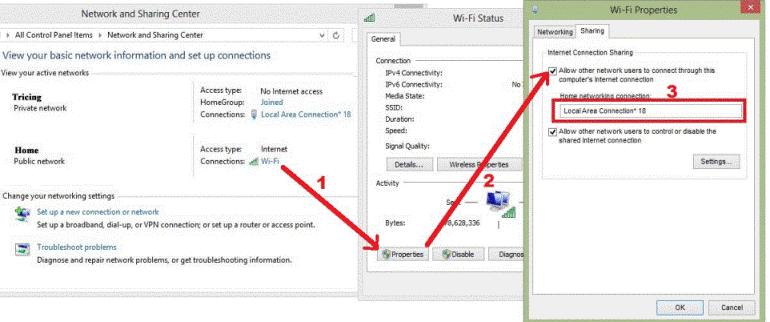
-> Now click on the “Connections” in Home [Connected to Internet] and click “Properties”
-> In the Properties window go to Sharing.
-> “Check in” the option “Allow other network users to connect through this computer’s Internet Connection“.
-> Select Home Networking Connection as ” Local Area Connection * 18“. Sample image as below.
Method 2:
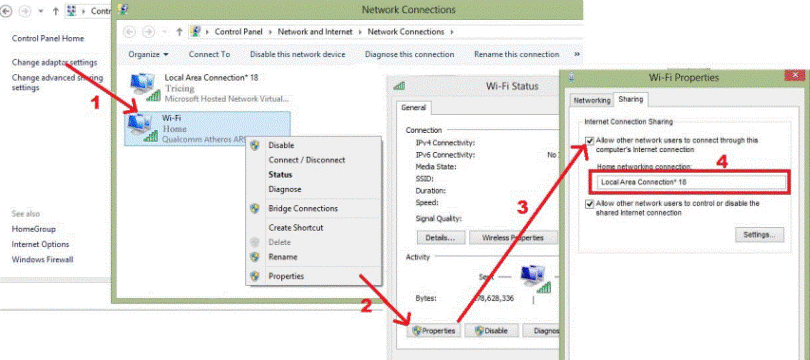
-> Go to ‘control Panel‘ and click ‘Network and sharing Center‘ as show below

-> You will see the ‘change adapter details‘ at the left side of the window
- Tricing [Hotspot]
- Home [Connected to Internet]
-> Now Right Click on the Home [Connected to Internet] and sele”Properties”
-> In the Properties window go to Sharing.
-> “Check in” the option “Allow other network users to connect through this computer’s Internet Connection“.
-> Select Home Networking Connection as “Local Area Connection * 18“. Sample image as below.
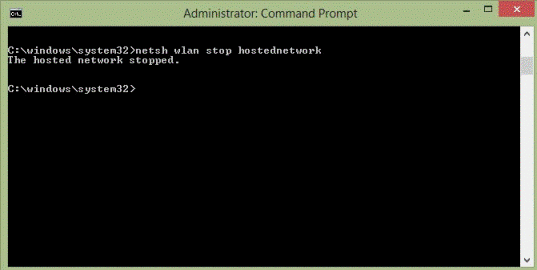
Step 6: Stop Wi-Fi Hotspot
To stop the Hosted Network service enter the below command and hit enter.
netsh wlan stop hostednetwork
0 Comment